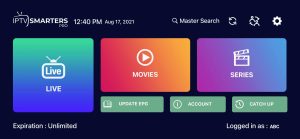
Configuring the IPTV Smarters Pro app on your device

Configuring the IPTV Smarters Pro app on your device involves several steps to connect it to your IPTV service provider and access television content. Here’s a general guide on how to configure IPTV Smarters Pro:

Note: Before you begin, you should have your IPTV service provider’s subscription details, including the server URL, username, password, and any other necessary information. Make sure your device is connected to the internet, and you have downloaded and installed the IPTV Smarters Pro app.

  1. Launch the IPTV Smarters Pro App:
    • Open the IPTV Smarters Pro app on your device.
  2. Accept Terms and Conditions (if prompted):
    • When you first launch the app, you may be asked to accept terms and conditions. Review and accept them if necessary.
  3. Enter User Details:
    • On the app’s main screen, you will see several fields for user details. Enter the following information:
      • Username: Your IPTV service username.
      • Password: Your IPTV service password.
      • Server URL: The server URL provided by your IPTV service provider.
  4. Configure EPG (Electronic Program Guide) (Optional):
    • If your IPTV service provider offers an EPG, you can enter the EPG URL or file path in the appropriate field. This step is optional, but it enhances the user experience by providing program information.
  5. Tap “Add User” or “Login”:
    • Depending on the version of IPTV Smarters Pro you are using, there may be an “Add User” or “Login” button. Tap the appropriate option to proceed.
  6. Access Channel List:
    • After successful login, you should have access to the channel list. You can navigate through the available channels and select the one you want to watch.
  7. Additional Settings (Optional):
    • IPTV Smarters Pro allows you to customize various settings. You can access settings by tapping the gear icon or menu option within the app. Some settings you can configure include video quality, parental controls, and subtitles.
  8. Enjoy Watching:
    • Once you’ve completed the configuration, you can start watching IPTV content. Navigate through the channel list, select a channel, and enjoy your chosen programming.
  9. Troubleshooting (if necessary):
    • If you encounter any issues, such as buffering or playback problems, you may need to adjust your settings or check your internet connection. Refer to the app’s troubleshooting section or contact your IPTV service provider for assistance.

Remember that the specific steps and options may vary slightly depending on the version of IPTV Smarters Pro you are using, as the app may receive updates and improvements over time. Always ensure that you are using a legitimate IPTV service with proper licensing for the content to avoid legal issues.

Configuring an IPTV set-top box

Configuring an IPTV set-top box involves several steps to ensure that it can connect to your IPTV service provider and deliver television content properly. Here’s a general guide to configuring an IPTV set-top box:

  1. Hardware Setup:
    • Connect your IPTV set-top box to your TV using an HDMI cable or other appropriate video/audio connections.
    • Connect the set-top box to your home network using an Ethernet cable or Wi-Fi, depending on the box’s capabilities.
  2. Power On the Set-Top Box:
    • Plug in the power cable of the set-top box and turn it on.
    • Ensure your TV is set to the correct input source (e.g., HDMI1, HDMI2) to see the set-top box’s interface.
  3. Initial Setup:
    • Follow the on-screen instructions to set your language, time zone, and other basic settings.
  4. Connect to Your IPTV Service:
    • Access the settings or configuration menu on the set-top box.
    • Locate the “Server Settings,” “Network Settings,” or “IPTV Settings” option.
    • Enter the necessary information provided by your IPTV service provider. This typically includes:
      • Server URL or IP address
      • Port number
      • Username and password
    • Some set-top boxes may also require a MAC address for authentication. You can usually find this information on a label on the bottom or back of the box.
  5. Channel List Setup:
    • Depending on your set-top box and IPTV service, you may need to manually add or import your channel list.
    • In the configuration menu, look for options like “Channel List,” “Channel Settings,” or “EPG (Electronic Program Guide) Setup.”
    • Enter the URL or file path provided by your service provider to load the channel list and EPG data.
  6. Channel Customization:
    • Some set-top boxes allow you to customize your channel list, reorder channels, and create favorite lists. You can usually do this in the channel settings menu.
  7. Test and Troubleshoot:
    • After configuring the set-top box, test it by selecting different channels and ensuring they play correctly.
    • If you encounter any issues, check your network connection, verify that the server settings are accurate, and ensure that your subscription is active.
  8. Additional Settings:
    • Explore other settings on the set-top box, such as video and audio settings, parental controls, and software updates.
  9. Remote Control:
    • Familiarize yourself with the remote control that came with the set-top box, as it may have specific buttons for functions like volume control, channel navigation, and accessing the menu.
  10. User Manual:
    • Refer to the user manual or documentation provided with the set-top box for specific instructions on configuration and troubleshooting.

Keep in mind that the exact steps and options for configuration may vary depending on the brand and model of your IPTV set-top box. Additionally, it’s important to use an IPTV service provider that is authorized and licensed to distribute the content you are accessing to ensure legal compliance.